Charging is a snap! Simply set the controller on the stand and click down to see the LED base light up to indicate charging level - Red means charging and Green means charged. When fully charged, click to release contact or simply leave the controller on the stand to display it in all its glory.
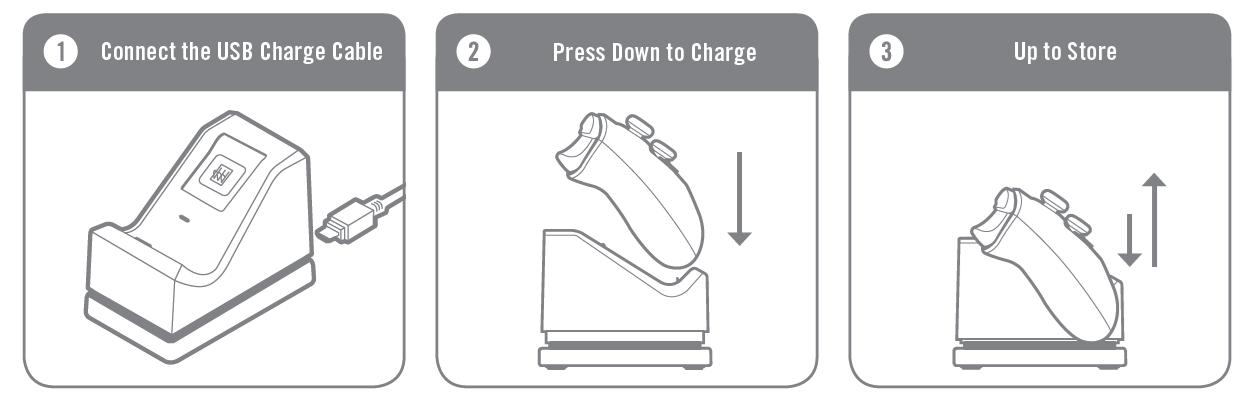
- Attach the rechargeable battery pack to your Xbox One controller.
- Connect the included USB Cable(Micro B) to the Charging Stand, and connect the other end(Standard USB) to your Xbox One or any other powered USB source.
- Place your Xbox One controller on the Charging Stand charge cradle and press down to initiate charging.
- The Charging Stand features LED illumination to indicate charging status. “RED” indicates the controller is charging, and “GREEN” indicates a fully charged controller.
- When the controller is fully charged, push down on the controller, the controllers charging cradle will move up and will no longer be making any contact with the Charging Stand. This feature allows you to store your controller on the Charging Stand without any risk of draining/pulling power.
- During gameplay you can reference the onscreen battery indicator icon to monitor current battery power status.
Have more questions? Submit a request
Share this: