ASSEMBLY AND SETUP
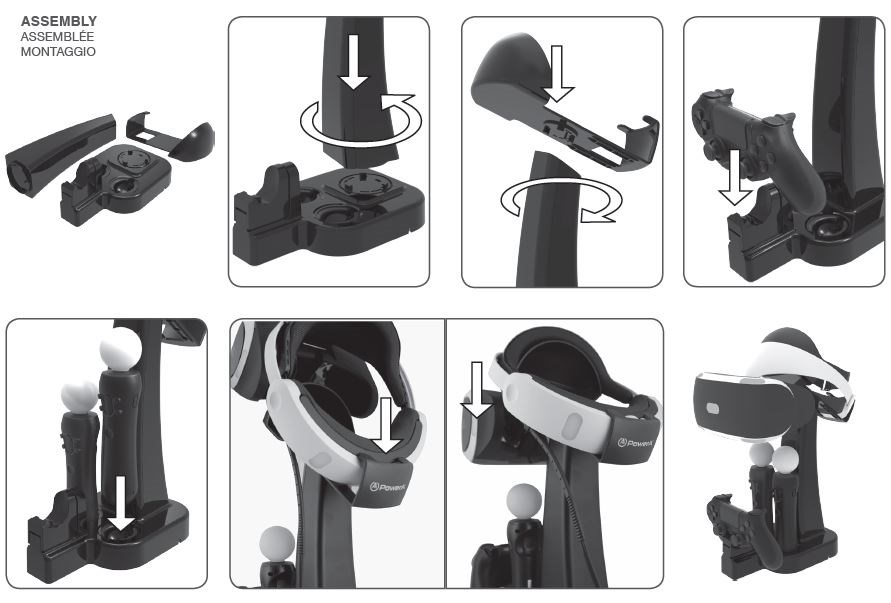
1. Remove the Charging Base, Neck, and Headset Rest pieces from the packaging.
2. Align the triangle on the Charging Base with the triangle on larger end of the Neck, and press the Neck down onto the Charging Base, rotating slightly if necessary until the tabs fall into place.
3. Rotate the Neck until the parts snap together securely.
4. Align the triangle on the Headset Rest with the triangle on the Neck, and press the parts together until the tabs fall into place.
5. Rotate the Headset Rest until the parts snap together securely.
6. Insert the AC adapter jack into the port on the bottom of the Charging Base, and position the assembled Charge and Display Station on a stable surface with at least 4 inches of clearance on each side. The side of the station with the DUALSHOCK®4 wireless controller Charging Dock should be facing the user.
7. Plug the AC adapter into a nearby wall outlet or power strip.
8. The Charge and Display Station for PlayStation®VR is now ready for use.